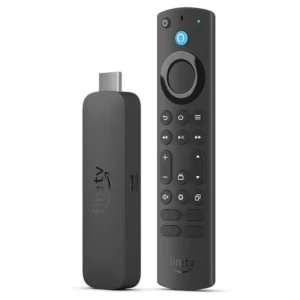
How to Install and Set Up Your Amazon Fire TV Stick (Step-by-Step)

How to Install and Set Up Your Amazon Fire TV Stick (Step-by-Step)
✅ What You’ll Need:
-
A Fire TV Stick (any model)
-
HDMI-compatible TV
-
Wi-Fi connection
-
Amazon account
-
USB power adapter (comes in the box)
📦 Step 1: Unbox Your Fire TV Stick
-
Inside the box, you should find:
-
Fire TV Stick
-
Remote control
-
USB power cable
-
Power adapter
-
HDMI extender
-
2 AAA batteries
-
📺 Step 2: Connect Fire TV Stick to Your TV
-
Plug the Fire TV Stick into an HDMI port on your TV.
-
Use the HDMI extender if space is tight.
-
Connect the USB cable to the Fire Stick and plug the other end into the power adapter.
-
Plug the adapter into a wall socket (don’t use TV’s USB port for power).
🔌 Step 3: Power On and Select HDMI Source
-
Turn on your TV and select the HDMI input where you plugged the Fire Stick.
-
You’ll see the Fire TV logo appear.
🎮 Step 4: Pair the Remote
-
Insert the AAA batteries into the remote.
-
It should automatically pair. If not, press and hold the Home button for 10 seconds.
🌐 Step 5: Connect to Wi-Fi
-
Use the remote to select your Wi-Fi network.
-
Enter your password and connect.
🧾 Step 6: Sign In to Amazon
-
Sign in with your Amazon account.
-
Or create a new account if you don’t have one.
📲 Step 7: Finish Setup
-
Choose settings like Parental Controls, App preferences, etc.
-
You can skip steps if you want to adjust later.
🌟 Optional: Install IPTV Apps
Now that your Fire TV Stick is ready, you can install IPTV apps like:
-
Downloader (to sideload APKs)
-
IPTV Smarters Pro
-
Hot IPTV
-
TiviMate
-
Smart IPTV
🔽 Want to install IPTV Smarters Pro? Click here for the guide.
